Turmeric Anthotype
The Basics
Emulsion Ratio: Approx. 1:7 => Turmeric to Isopropyl Alcohol
Layers Applied: 3-4
UV/Wattage: 395nm/300w
Ideal Exposure Time: 3 hr
Development Process: Saturated Baking Soda/Water Solution
WARNING: Turmeric anthotype emulsion WILL STAIN EVERYTHING IT TOUCHES!!! Please use proper caution while making and applying the emulsion.
395nm / 300w
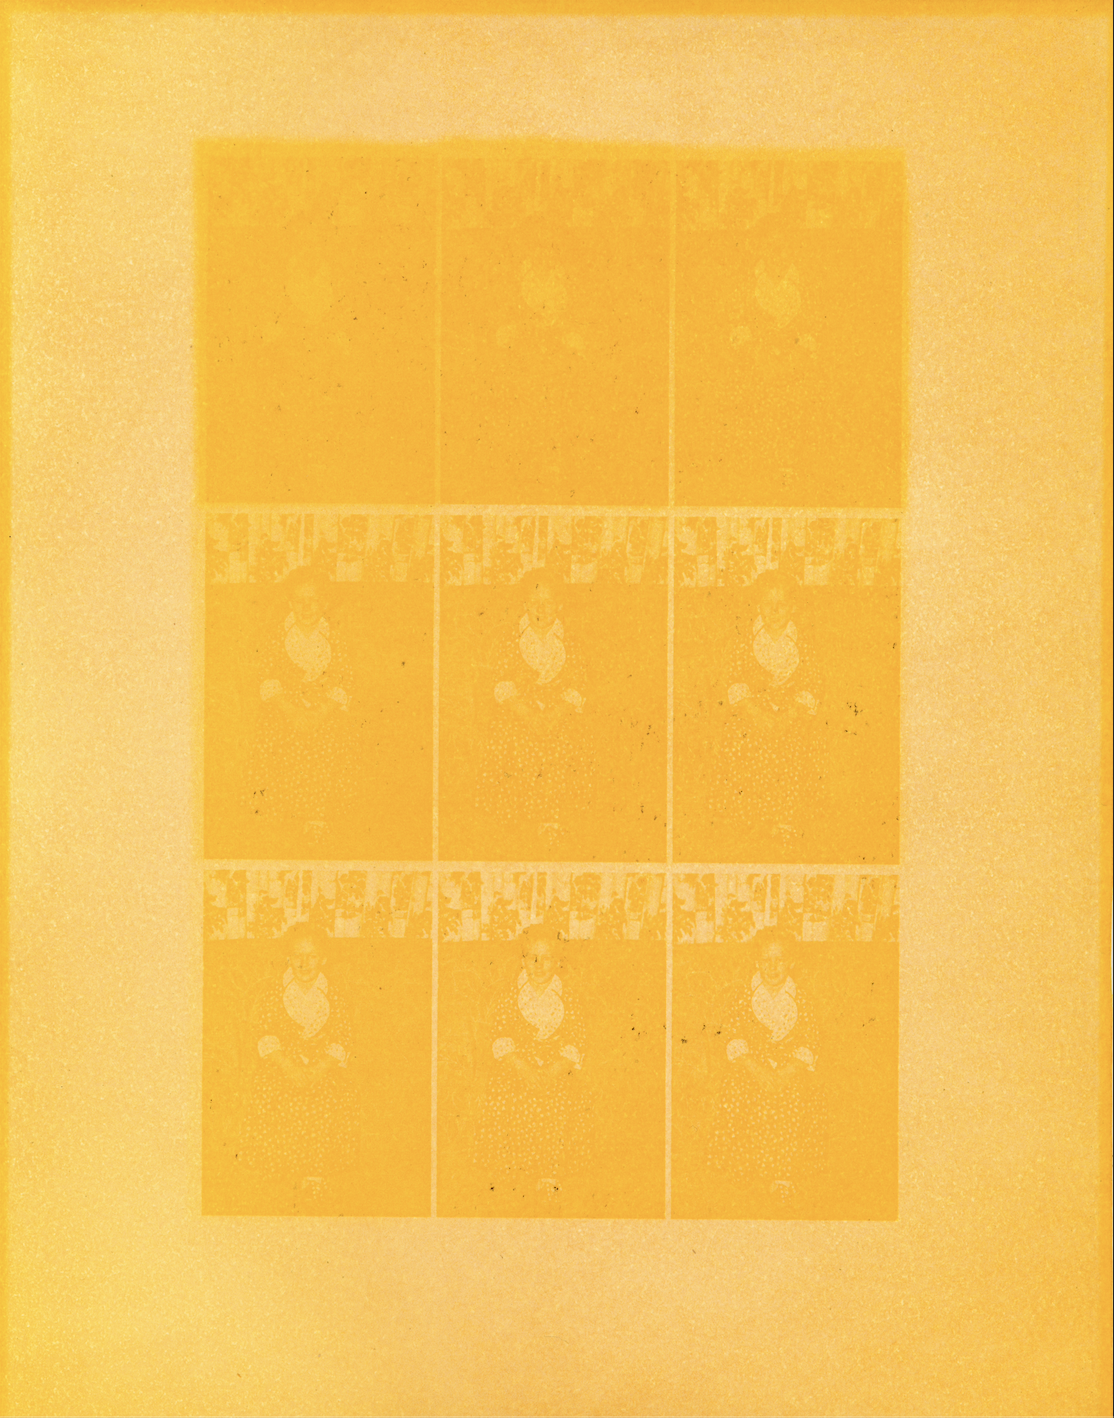
Undeveloped turmeric anthotype test sheet; 15 min-4 hrs under 300 watt UV exposure unit; see time sheet for exact time
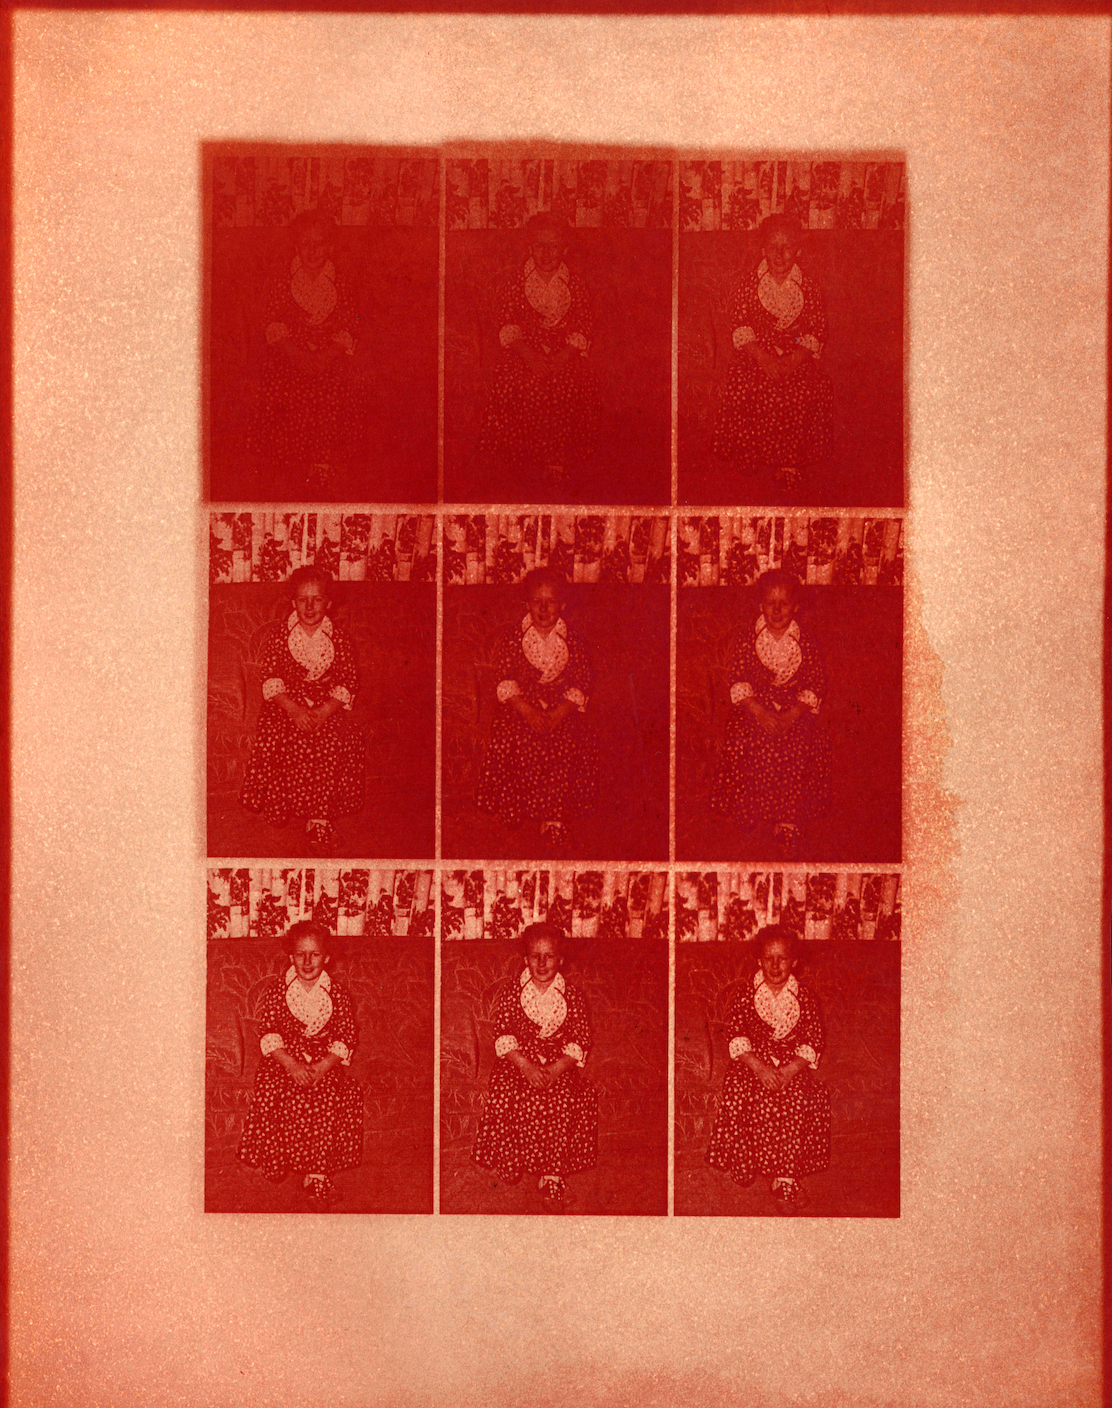
Developed turmeric anthotype test sheet after submersion in baking soda solution; 15 min-4 hrs under 300 watt UV exposure unit; see time sheet for exact time
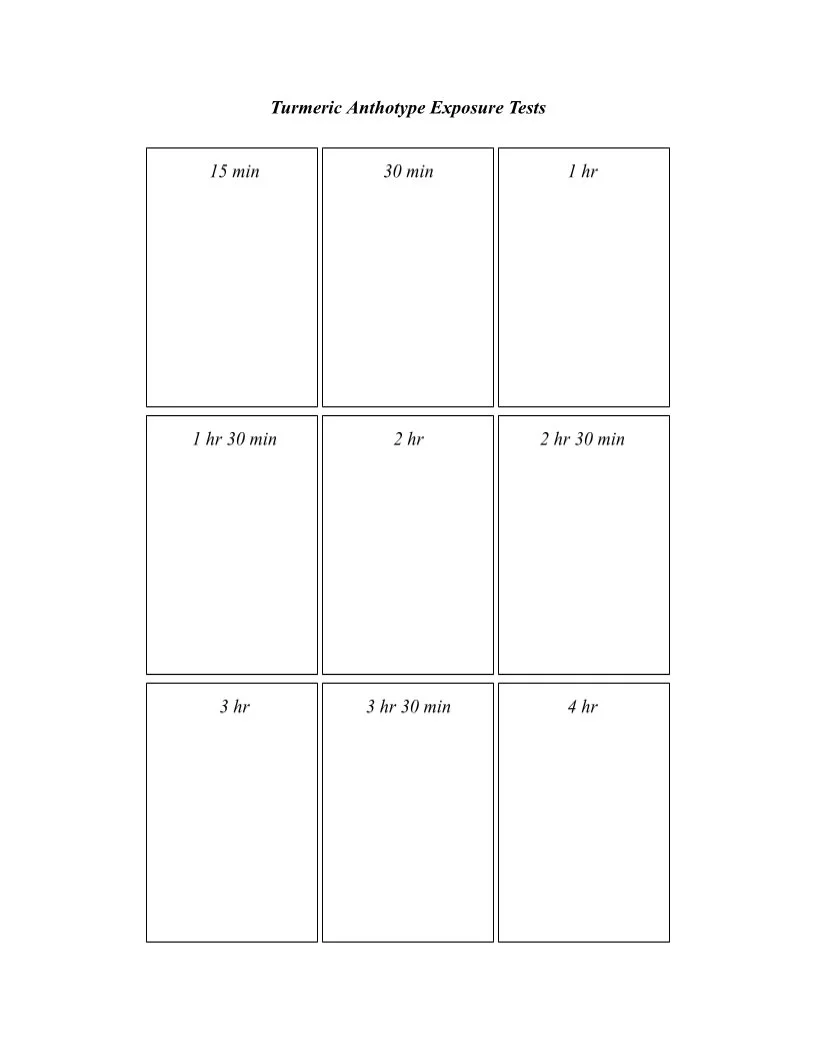
Turmeric anthotype time sheet: 15 min-4 hr
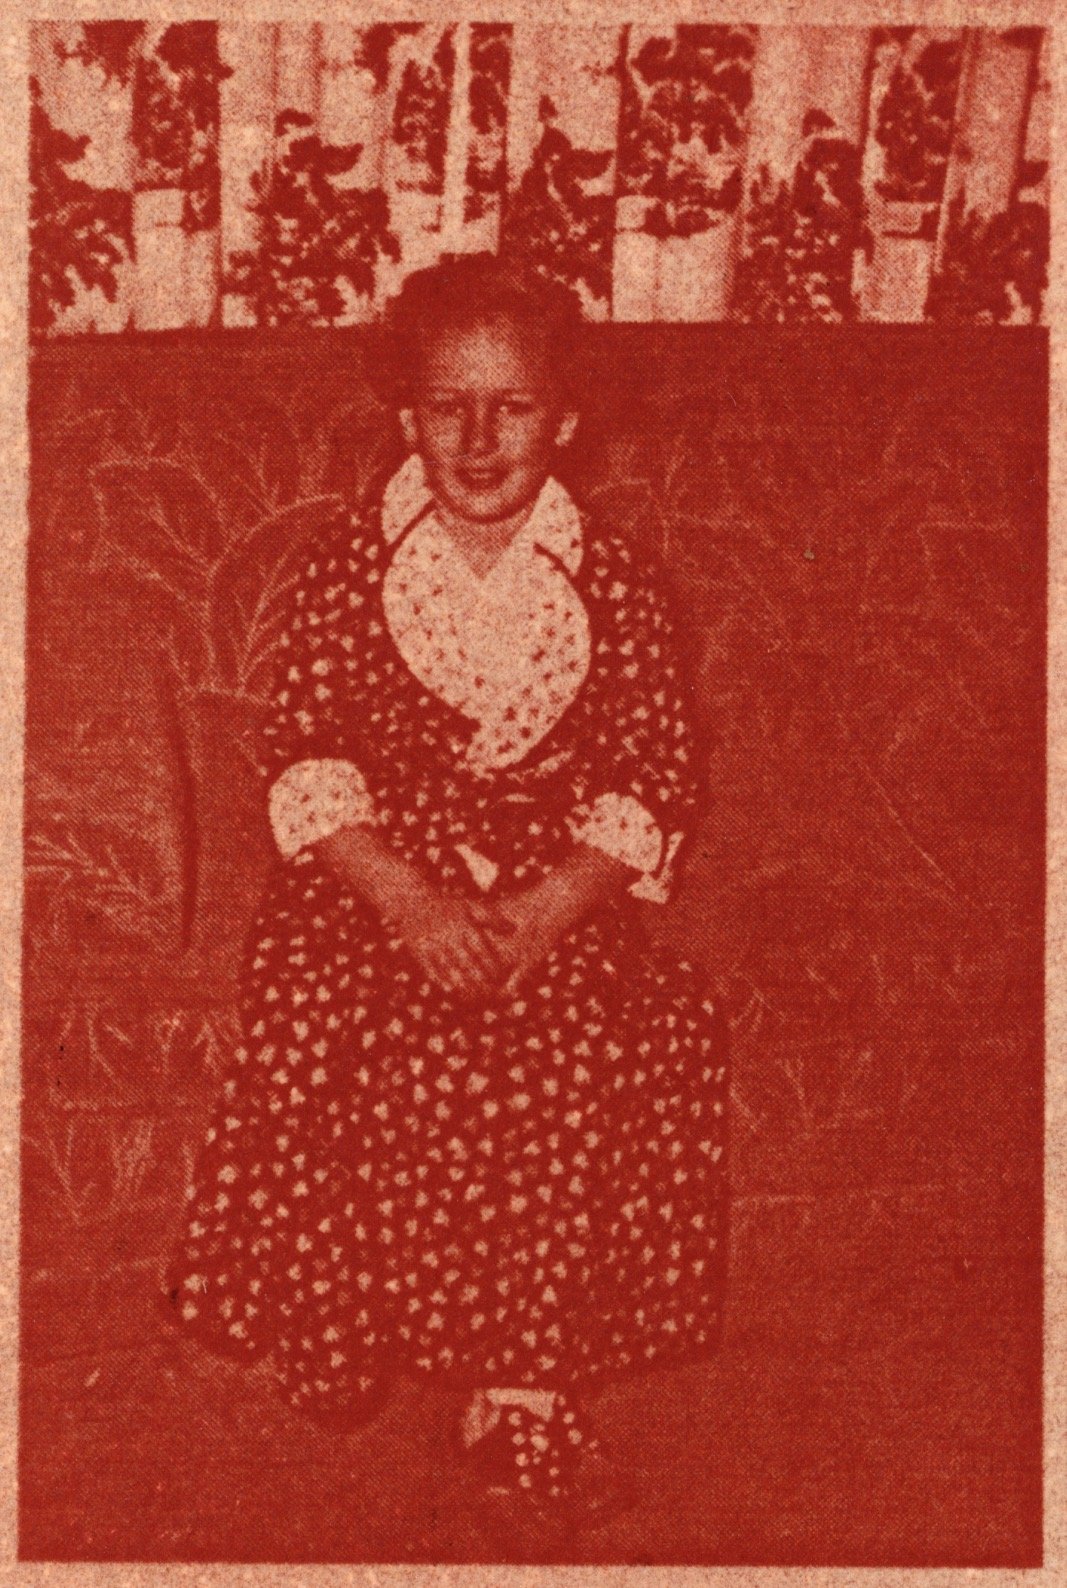
Ideal exposure time: 3 hr
This turmeric anthotype test uses an emulsion made of a 1:7 ratio of ground turmeric to isopropyl alcohol. I personally used Walmart's “Great Value” brand ground turmeric, though I’m sure the results will be fairly consistent regardless of brand. 3-4 layers of emulsion were applied to 300g watercolor paper with a foam brush and allowed to dry between each layer. I have included the specifications of the paper for reproducibility’s sake, but this process will work on almost any permeable surface and, with some finagling, many impermeable surfaces. A transparency was placed on top of the emulsion-coated paper, both were loaded into a makeshift contact printing frame, and then exposed to UV; first in increments of 15 minutes (15 min-30 min), then in increments of 30 minutes (30 min-4 hr). Between each increment, a piece of black duct tape was placed over a section of the transparency, blocking the UV light from that particular segment. After 4 hours, the print was removed from the frame and submerged in a baking soda/water solution. The ratio of baking soda to water does not seem to matter, so long as you use enough baking soda for it to be a saturated solution (particles of baking soda remain at the bottom of the basin). Let the print dry and voilà, you’re done.